Wednesday, November 12, 2008

Cheesecake

This is one of the easiest (and yummiest) cheesecake recipes I have found. Many of the cheesecake recipes I've seen seem complicated and are a bit intimidating. Not this one, though.


Ingredients

- 9 graham crackers, finely crushed
- 1 cup sugar
- 3 tablespoons sugar
- 5 tablespoons butter, melted
- 40 oz. cream cheese, softened (I used five 8 oz. packages of Philadelphia brand)
- 3 tablespoons flour
- 1 tablespoon vanilla extract
- 1 cup sour cream
- 4 eggs

* The measurements given above are just guidelines. Please feel free to adjust the quantities according to your preferences. Like it sweeter? Add more sugar! Like it less sweet? Leave out some sugar. Like vanilla? Put in more! You get the idea. *

Preheat oven to 325 degrees.

Mix crumbs, butter, and 3 tbsp. sugar in a mixing bowl. Mix until the crumbs are slightly moistened (add more butter if needed).

Line a 13 x 9 inch pan with foil. Press the crumbs onto the bottom of the pan.

Bake the crust for 10 minutes, and remove from oven.

Beat cream cheese, 1 cup sugar, flour, and vanilla extract until well blended. Add in the sour cream, and continue to blend.

Add the eggs, one at a time. Beat on low speed until well blended.

Bake 40 minutes, or until center is almost set.

Cool completely, and refrigerate 4 hours (you can put it in the freezer if you are pressed for time).

You may serve plain, or top with fresh fruits, or pie filling.

Thursday, October 16, 2008

Worms in dirt

In honor of Halloween coming up, I made these "worms in dirt."


They are really easy to make, and if you have kids in your house or family, they will love them.

Ingredients

- chocolate cake mix (1 box)
- chocolate frosting
- Oreo cookies
- gummy worms

Bake the cupcakes according to the instructions on the box.

When the cupcakes are done and have cooled, frost each one with chocolate frosting.

Take your Oreos, and separate the cookie sandwiches by pulling/twisting the two halves apart. Using a butter knife, scrape the white creme filling off from both sides, so that all you have left are the brown cookie parts. Place your cookies in a sandwich bag, and crush the cookies until you have a very fine, powdery consistency (as close to this as possible).

Sprinkle the top of each of the frosted cupcakes with the crushed Oreos to create the "dirt."

Lastly, top each of your cupcakes with one gummy worm.


Tuesday, September 2, 2008

Chocolate-covered strawberries cake

Following my basic birthday cake recipe, I created this chocolate-covered strawberries cake. The two-layer cake was dark chocolate flavored, and both layers had a layer of cream and strawberries as its filling.


For the chocolate-covered strawberries:

Ingredients

- semi-sweet chocolate chips
- vegetable shortening

Wash and thoroughly dry the strawberries. Pour chocolate chips in microwave-safe bowl, add a small amount of shortening, and microwave in 30-second intervals until chocolate chips are melted (stir the chocolate chips each time you check). Carefully dip each strawberry in the melted chocolate, and place on cookie sheet covered in wax paper to cool. You may refrigerate/freeze the strawberries for faster drying time.

In addition to the strawberries, I lined both the bottom and top layers with mini-marshmallows and chocolate chips along the bottom. I also used crushed Oreo cookies and sprinkled it across the top layer. Lastly, I drizzled some melted (but cooled) chocolate across the cake to give it a nice finishing touch.


Monday, July 21, 2008

Gelatin-Topped Cake

Using my basic birthday cake recipe, I created a gelatin-topped fruit cake. The cake was made the same way as my other cakes; the only difference is the gelatin topping I made. For this step, I used the following ingredients:

- Knox unflavored gelatin
- Fresh fruits, sliced very thinly
- Apple juice

Prepare the gelatin powder as directed on the box (sprinkle powder over cold juice, then add boiling juice and mix well). After mixing the powder with the juice, I poured the gelatin liquid mixture into an 8" cake pan (use the same size pan as your cake).

Refrigerate just until the mixture begins to solidify (about 20-30 minutes or so). Be very careful to watch the mixture closely and not let it become too firm, otherwise you will not be able to insert fruits into your gelatin.

Once your mixture is a gooey gel consistency, carefully place your sliced fruits inside the gelatin, making sure you push the fruit to the bottom of the pan. When you are satisfied with the design you have created, return the pan to the refrigerator, and allow your gelatin to set until very firm (around 2-3 hours or so).

When your gelatin is firm, take it out of the refrigerator and run a knife along the edges of your pan to loosen the gelatin. VERY carefully start from one end and peel your gelatin away from your pan.

After your gelatin creation is removed from the pan, turn it upside down (so your fruit design is exposed more clearly) and gently place it on top of your cake. You may decorate the rest of your cake as desired, taking care not to puncture or cover your gelatin with any other ingredients.

Voila! That's it!

Tuesday, July 15, 2008

Fruit Waffle Bowls

This is a really great recipe to get kids (and adults!) to eat more fresh fruit. It makes a beautiful presentation, and it's yummy!

Ingredients

- ice cream waffle bowls
- vanilla or white chocolate flavored instant pudding mix
- milk
- fresh fruits (strawberries, blueberries, grapes, raspberries, sliced kiwis, etc.)

Wash and thoroughly dry your fruits.

Prepare the instant pudding as directed on the box (add milk and whisk).

Put 2-3 spoons of pudding in the bottom of each waffle bowl. Generously top the pudding with lots of fresh fruits.

Serve immediately, as the waffle bowl will start to soften.


Whoppers Chocolate Cake

Based on my basic birthday cake recipe, I made this Whoppers malted milk balls chocolate cake for my nephew's birthday.

The inside was a 2-layer chocolate cake with a banana and whipped cream filling. I covered the outside of the cake with chocolate whipped cream (basic whipped cream with unsweetened cocoa powder), and decorated it with Whoppers around the edges. The top of the cake was decorated with crushed Whoppers, and lastly I drizzled chocolate over the entire cake.


Wednesday, May 14, 2008

The Basic Birthday Cake

I’ve been making birthday cakes for family and friends for years now. People always tell me they look so professional, but trust me, it really is much easier than it looks or sounds. It just takes some time and patience. Anyone can do it, really!

I always make a two-layer cake of some kind, with a layer of fruit and whipped cream in the middle.

So here’s what you’ll need:

- 1 box of cake mix (Yep, I use the boxed stuff! I’ve tried from-scratch recipes, but the boxed stuff always tastes better to me. I like using dark chocolate mixes. Trader Joe’s also has a really great vanilla bean mix.)

- Whatever ingredients are specified on the box (usually water or milk, eggs, vegetable oil)

- 2-3 cartons heavy whipping cream

- Powdered sugar

- Vanilla extract (I use one from Trader Joe's, which contains actual vanilla beans in the extract)

- Knox brand unflavored gelatin

- Colorful fruits (strawberries, blackberries, kiwis, etc.)

First, prepare the cake as specified on the box. Some tips…

* You can use different pans depending on what shape you want your cake to be. I personally like round, two-layer cakes. So I divide my batter between two 8-inch round pans.

* When it says to grease your pan, I like to use a little olive oil, and spread it around the pan with a clean napkin. I know there are cooking sprays and stuff, but those always seem so chemical-ish to me.

* When the cake “looks” ready, stick a clean toothpick in the center of the cake, down to the bottom of the pan. If it comes out clean, then you will know your cake is ready. Be sure to monitor your time well; you don’t want to overcook your cake, or else it’ll be dry.

* Before you try and remove the cake from the pan, give it a good 15-20 minutes to cool off. Carefully run a fork along the sides of your cake, gently lifting the bottom of the cake ever so slightly as you make your way around. This will loosen your cake so that it is easier to remove. I usually flip the pan upside down, catching the cake in my other hand (I do this over the sink, as not to get crumbs everywhere).

Once you’re done with the actual baking, you will need to make the whipped cream. I guess you could use those cans of premade frosting, but I don’t really like frosting (except maybe on cupcakes). I find frosting on cakes to be too sweet, so I like using whipped cream. And because I make my own whipped cream, I have more control on how sweet I would like it to be.

So, to make your whipped cream, make sure you have everything you need ahead of time (it’s difficult to stop in the middle to get your ingredients). Also, keep the whipping cream in the refrigerator until you need to use it. It won’t whip up if it is room temperature, so the colder the better.

In a large mixing bowl, pour your whipping cream in. I find it easier to work with just one carton at a time. It can be difficult to whip when you have too much liquid.

After you’ve poured in your whipping cream, use a hand mixer and work your way into the cream at a high speed. It will start out as a creamy liquid, and as you whip it and add air into the liquid, it will slowly start to thicken. Be patient and don’t get frustrated - it takes me around 3-5 minutes to see it start to thicken.

When you see it starting to thicken, you can start adding the other ingredients. I usually add the powdered sugar first, one spoon at a time. I usually use around 4-5 rounded spoonfuls of sugar to sweeten the cream. You can add more/less to your taste, but this is how much I usually use.

After you have whipped the sugar into the cream, then add the unflavored gelatin. I don’t measure, so I couldn’t tell you exactly how much, but it takes just a pinch or two. The gelatin is supposed to help solidify your whipped cream so that it stays in a somewhat solid state.

Lastly, add in your vanilla extract. Again, I don’t measure, but I usually add in a teaspoon or two. You can add more/less to your liking.

By this time (you should have continued mixing all this time while adding all the ingredients) your cream should be thickened. Move your mixer around in the cream in circular motions, making sure to cover all areas of the mixing bowl. You will know your cream is ready when soft peaks form. Don’t overwhip – stop when you see soft peaks!

Here’s where the fun begins – assembling your cake.

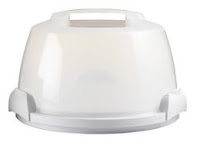
Take one layer of your baked cake (which should be cool by now) and place it on your serving dish. You can use a large plate, or if you have one, I like using a cake carrier. The carrier comes in especially handy when I am baking for an event that is anywhere but home. It makes transporting the cake much easier.

Spread a layer of whipped cream on top of your first layer. Add a layer of chopped fruit (I like using strawberries) on top of the cream, and layer more whipped cream on top of your strawberries. Be generous with this final layer of cream, as it will help “glue” your strawberries together.

Take your second cake, and gently place it on top of the arrangement you have already put together. Gently put a little pressure on the top cake layer and press down to make sure your layers are solid and won’t fall apart.

Now that you’ve got all your layers together (from bottom to top: 1st cake, cream, chopped fruits, cream, 2nd cake), you need to frost your cake with the remaining whipped cream. Start first in the seam that is exposed between your two cake layers. Rotate your cake as you fill in the exposed seam.

Once that area is filled in, cover the entire cake with cream. Make sure you cover the cake well enough so that none of it is peeking through.

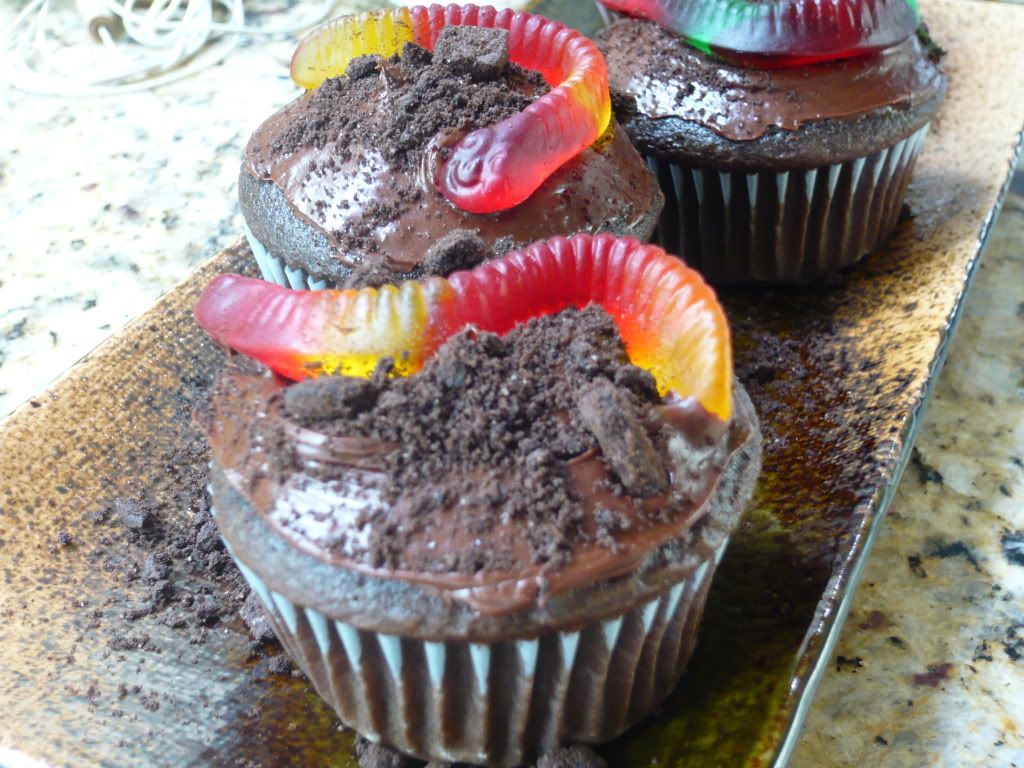
You’re almost done! Now the last part, which is the most fun – decorating! Use your colorful fruits to make designs on your cake. You can also use candy, cookies, cocoa powder, powdered sugar, sprinkles, chopped nuts, etc. to decorate. Be creative and play around!

And that’s it! It may sound a lot harder than it really is. But it really isn’t very difficult to do. Just give yourself plenty of time, and be patient. Have fun! :)

Here are a few pictures of cakes that I’ve made using these basic instructions.